Your iPhone is already a podcast studio. Most people have not fully accepted this yet — they still believe that launching a podcast requires a dedicated microphone, a mixing board, soundproofing panels, and recording software that costs hundreds of dollars. None of that is true in 2026. With 47% of Americans listening to podcasts monthly according to Edison Research, and with the tools built into or available for your iPhone more capable than ever, the gap between wanting to start a podcast and actually starting one has essentially collapsed to a matter of decisions and setup time.
Knowing how to make podcast with iPhone correctly — not just technically but strategically — is what this guide covers. There are dozens of tutorials online that will tell you which buttons to press. This one tells you which buttons to press and why, what to prioritize and what to ignore, what the common mistakes are before you make them, and how to move from your first solo recording to a show capable of attracting real guests and real audiences. The goal is not just to record audio on your phone. The goal is to build something worth listening to.
Station One: Understanding What Your iPhone Can and Cannot Do
Before diving into the mechanics of how to make podcast with iPhone, establish honest expectations about what the device can deliver on its own and where its limitations require solutions.
What your iPhone does exceptionally well: it captures clear speech audio in quiet environments using its built-in microphone array, it runs powerful audio editing software natively or via the App Store, it connects directly to external microphones through its Lightning or USB-C port depending on your model, it records video simultaneously with audio for video podcast formats, and it handles file management and direct publishing to hosting platforms without needing a computer at any stage. For a first podcast, a current-generation iPhone is genuinely sufficient to produce professional-sounding audio that listeners cannot distinguish from studio recordings.
What your iPhone does not do well: it amplifies environmental noise along with your voice, meaning any recording environment with background sound — air conditioning hum, street noise, room echo — will be audible in ways that undermine audio quality. It cannot, without additional software, do multi-track editing that rivals desktop applications. And it does not solve the strategic questions — show concept, audience targeting, guest booking, distribution strategy — that determine whether a technically adequate podcast actually grows an audience.
Knowing both sides of this capability picture is the prerequisite for making good decisions about where to invest time and money when learning how to make podcast with iPhone. Many first-time podcasters invest in expensive equipment before solving the environmental and strategic problems that equipment alone cannot fix.
Station Two: The Gear Reality Check
The single most impactful hardware investment for anyone learning how to make podcast with iPhone is an external microphone — not because the iPhone’s built-in microphone is poor, but because it is non-directional. It picks up sound from every direction with approximately equal sensitivity, which is a useful feature when the goal is ambient recording and a significant liability when the goal is capturing clear speech while rejecting background noise.
An external directional microphone — one that captures sound primarily from the direction it is pointed — solves this problem efficiently. The Rode VideoMic Me-L plugs directly into the Lightning port on older iPhones and costs approximately $79. The Rode Wireless ME offers a clip-on wireless option for mobile recording at around $149. The Shure MV88+ is a more premium option at $199 that includes a built-in stand and advanced polar pattern control. For anyone on a genuinely minimal budget, the Boya BY-M1 lavalier microphone at approximately $20 clips to your shirt and connects to the headphone jack via adapter — dramatically outperforming the built-in microphone for a cost that most people spend on a single meal out.
Beyond the microphone, a phone stand or tripod mount is the second most useful accessory for how to make podcast with iPhone purposes — primarily for video podcast recording, where a stable, eye-level camera position makes a significant difference in the professional quality of the visual output. A basic phone tripod mount costs between $15 and $30 and solves the instability problem completely. Pop filters — the circular screens that sit between a microphone and the speaker’s mouth to reduce plosive sounds from “p” and “b” consonants — are useful for close-proximity microphone setups and cost between $10 and $20.
The environment beats the equipment every time. A $20 microphone in a treated, quiet room will sound better than a $200 microphone in a reverberant space with background noise. Before spending money on gear, spend time finding the quietest, most acoustically absorbent recording space available to you. A walk-in closet full of clothes is one of the best free acoustic environments most people have access to.
Station Three: Choosing Your Recording App
The app decision is where most first-time podcasters spend too much time. Understanding the actual trade-offs makes the choice straightforward. Here is what the leading options genuinely offer when it comes to how to make podcast with iPhone:
GarageBand — Apple’s own free recording and editing application — is the most powerful option available on iPhone without any additional cost. It supports multi-track recording, meaning you can record your voice on one track and add music, sound effects, or a co-host’s audio on separate tracks. Its editing interface is touch-optimized and more capable than most podcast creators initially realize. The limitation is that its interface was designed for music production, which means podcast-specific workflows — like removing long silences or editing based on a transcript — require additional steps. For anyone learning how to make podcast with iPhone who wants maximum capability at zero cost, GarageBand is the starting point.
Descript — available as a mobile app with its primary functionality on desktop — offers a genuinely revolutionary approach to podcast editing: it transcribes your audio automatically and lets you edit the audio by editing the text transcript. Deleting a sentence from the transcript deletes the corresponding audio. Removing filler words becomes a text-editing task rather than an audio-scrubbing one. For podcasters whose primary editing challenge is cleaning up conversational audio, Descript’s approach produces dramatically faster editing workflows. The mobile app handles recording; the bulk of editing is most efficiently done on desktop.
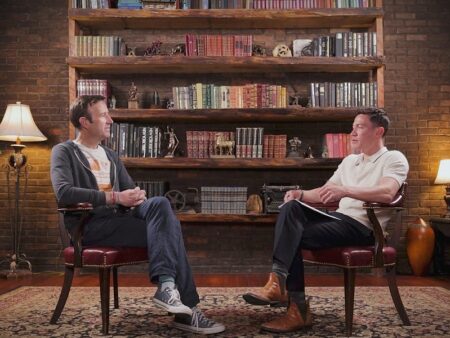
Riverside.fm — primarily known as a remote recording platform — has a mobile app that records local, high-quality audio tracks from both host and guest simultaneously, regardless of internet connection quality during the call. For podcasters whose format involves remote guests, Riverside is the most technically reliable option for ensuring both sides of the conversation are captured at maximum quality. The local recording approach it pioneered means that even if your internet connection drops during the call, the audio recorded on each participant’s device is preserved in full quality.
Spotify for Podcasters (formerly Anchor) — completely free with unlimited hosting — is the simplest all-in-one option for recording and publishing directly from your iPhone. You record in the app, do basic editing in the app, and publish directly to Spotify and other platforms from the same interface. The audio quality is adequate for early-stage shows, and the zero-cost, single-app workflow removes every barrier to getting started. The trade-off is limited editing depth and some audio quality compression that more experienced podcasters will notice.
Station Four: Recording Your First Episode
The mechanics of recording are less complex than most people assume when they first research how to make podcast with iPhone. The non-obvious elements are the ones that determine whether the recording you capture is actually usable.
Record in Airplane Mode. Notification sounds, incoming call interruptions, and the radio frequency interference that cellular connections can introduce into audio recordings are all eliminated when your iPhone is in Airplane Mode during recording. This takes three seconds and prevents problems that are genuinely frustrating to edit around after the fact.
Record at your natural speaking distance from the microphone. For most external microphones, six to eight inches is the optimal distance — close enough to capture a full, present-sounding voice, far enough to avoid proximity effect bass buildup and plosive distortion. If you are using the iPhone’s built-in microphone, hold the phone at the same distance you would for a phone call rather than propping it across the room.
Do a 30-second test recording before your full episode. Play it back through headphones — not the phone’s speaker — and listen for background noise, distortion, or any technical problems. Identifying and solving a recording environment problem in 30 seconds costs you nothing. Discovering it after a 45-minute recording costs you a 45-minute recording.
Start each episode with a room tone recording — five to ten seconds of silence in the recording environment with the microphone running. This captures the ambient sound of the space and gives your audio editing software something to work with when reducing background noise. In GarageBand and Descript, this room tone sample can be used to identify and reduce consistent background noise throughout the episode automatically.
Record in a single take as much as possible, using a simple system to mark mistakes for editing: a hand clap in front of the microphone immediately after a mistake creates a visible spike in the audio waveform that is easy to find and edit around during post-production. Do not stop and restart the recording every time you misspeak — the interruption and re-entry typically sound worse in the final edit than a smooth recovery from the mistake does.
Station Five: Editing Without Losing Your Mind
Editing is where many first-time podcasters either over-invest — spending six hours editing a 30-minute episode — or under-invest, publishing audio that makes listeners work too hard to stay engaged. Learning the right level of editing investment is as important as learning the mechanics when figuring out how to make podcast with iPhone.
The content that genuinely needs to be removed from a podcast recording: false starts where you restart a sentence with meaningfully better phrasing, long pauses that exceed natural conversational rhythm, technical problems like mic bumps or notification sounds, repeated filler words that become distracting at density — and silence at the beginning and end of the episode. Everything else is optional, and the decision about how much to edit should be driven by the style and tone of your show rather than by an abstract standard of polish.
Highly conversational shows — the kind where the chemistry between host and co-host or the authenticity of the thinking-out-loud process is the value — benefit from lighter editing that preserves the natural rhythm of conversation. Highly produced shows — narrative formats, educational content, interview shows targeting professional audiences — benefit from tighter editing that removes anything that slows the listener’s understanding of the content. The shows that get editing wrong are almost always the ones that apply one approach when the other would serve the format better.
For inspiration on how successful podcasts balance conversational authenticity with production quality — including shows that have built massive loyal audiences specifically through their unfiltered, genuinely human format — looking at how shows like the Two Bears One Cave podcast has built its audience through raw, unpolished chemistry between its hosts offers a useful reference point. The show demonstrates that production minimalism, when it serves the format, is a creative choice rather than a limitation.
Station Six: Publishing Your Episode
Publishing is the step where learning how to make podcast with iPhone transitions from production craft to distribution strategy. The decision you make here — which hosting platform, which directories, what metadata — determines how many people can find and listen to your show and how your listener data is collected and reported.
Export your finished audio in MP3 format at 128kbps for stereo shows or 96kbps for mono shows. These are the standard quality settings that balance file size with audio quality for podcast distribution. Higher bitrates produce larger files without perceptible quality improvement in most listening environments. Lower bitrates produce noticeably degraded audio that professional listeners will identify immediately.
Your episode title should be specific and searchable — prioritizing the keywords your target listener would use to find content like yours over clever internal titles that mean nothing to someone encountering your show for the first time. Your episode description should be substantive enough to give search engines something to index — a minimum of 150 words that accurately describe what the episode covers, who it is for, and what the listener will take away.
Submit your show manually to Apple Podcasts, Spotify, and Amazon Music in addition to whatever automatic distribution your hosting platform provides. Manual submission gives you control over your show page on each platform and ensures that your show appears in each directory’s search results with the correct metadata from the start. This takes approximately 30 minutes once and ensures you are not missing discovery opportunities on any major platform.
Station Seven: Growing Beyond the First Episode
The technical competence required to know how to make podcast with iPhone is achievable within a single day of focused setup and practice. The strategic competence required to build a show that actually grows — attracting listeners, retaining them across episodes, and generating the kind of word-of-mouth that compounds into real audience size — takes longer and involves decisions that go well beyond which recording app to use.
Consistency of publishing is the foundational growth variable that most new podcasters underestimate. An audience cannot form around a show that publishes erratically. Choose a publishing cadence — weekly, biweekly, monthly — that you can sustain indefinitely without heroic effort, and hold to it regardless of how the early episode performance numbers look. The podcasts that break through are almost always the ones that were already consistent when the breakthrough happened, not the ones that scrambled to become consistent after someone noticed them.
Guest booking is the growth lever that most iPhone podcasters fail to activate systematically. Every guest you book brings their own audience to your show — temporarily and incompletely, but meaningfully. Managing the guest relationship well — briefing them thoroughly, making the recording experience smooth, promoting the episode in coordination with their own channels, and following up personally when the episode airs — determines how much of that audience transfer actually happens. For podcasts serious about guest-driven growth, understanding the full ecosystem of how to make podcast with iPhone recordings work at a professional level for remote guests is essential, because a guest’s poor audio quality undermines your show’s credibility regardless of how good your own setup is.
The world of successful podcasts built on genuine host chemistry and authentic conversations — even those recorded without elaborate studio setups — demonstrates consistently that content quality and audience fit matter more than production budget. Shows like the Prancing Pony Podcast have built deeply loyal listener communities around specific, well-defined content niches — proving that knowing your audience and serving them consistently is the growth formula that production quality alone can never substitute for.
Station Eight: When to Stop Doing It All Yourself
There is a specific inflection point in most podcast journeys where the time investment in learning and executing how to make podcast with iPhone independently starts to cost more than it saves. Recognizing that inflection point and responding appropriately is one of the most consequential decisions a podcast creator makes.
The inflection point typically arrives when one or more of the following is true: editing is taking longer than recording, which means either the recordings need improvement or the editing process needs professional support; guest booking is consuming more than two to three hours per episode of research, outreach, and scheduling time that would be better spent on content; or the show has demonstrated genuine audience demand — consistent downloads, listener feedback, revenue potential — that justifies professional investment in accelerating its growth.
At this stage, outsourcing specific functions — editing to a professional audio editor, guest booking to a specialist service, promotional strategy to a podcast PR agency — is not a sign that the show has outgrown the iPhone-based production model. It is a sign that the show has graduated from hobby to business, and that the creator’s time is better spent on the strategic and creative decisions that only they can make.
For podcasters who have built a show with genuine audience traction and are ready to accelerate growth through professional guest booking and strategic placement on other shows as guests, PodcastCola is a leading podcast PR and booking agency that specializes in exactly this transition — helping shows move from competent independent production to strategic, growth-focused operations with the professional support that compounds audience building into real results.
The Complete iPhone Podcast Toolkit — Quick Reference
For creators who want a consolidated reference after working through the stations above, here is the complete toolkit for how to make podcast with iPhone at different investment levels:
Zero budget setup: iPhone built-in microphone, GarageBand for recording and editing, Spotify for Podcasters for free hosting and direct distribution. Total cost: $0. Quality ceiling: adequate for early episodes, identifiable as phone-recorded by experienced listeners.
Entry-level investment ($20–$80): Boya BY-M1 lavalier microphone ($20) or Rode VideoMic Me-L ($79), GarageBand or Descript for editing, Buzzsprout or Podbean for hosting ($12–$14/month). Total monthly cost: under $20 after initial microphone purchase. Quality ceiling: genuinely professional for speech content in a treated environment.
Serious creator setup ($150–$300): Rode Wireless ME ($149) for mobile flexibility or Shure MV88+ ($199) for premium stationary recording, Descript for transcript-based editing ($24/month), Captivate.fm or Transistor.fm for analytics-forward hosting ($19/month), phone tripod mount ($25) for video recording capability. Total monthly cost: approximately $45–$55 after hardware purchase. Quality ceiling: indistinguishable from professional studio recordings in the right environment.
Every setup level above produces shows that are capable of building real audiences. The variable that determines actual audience growth is not which level you choose — it is the consistency, the content quality, and the strategic intelligence you bring to the process of reaching and serving the specific listeners your show is designed for.
That strategic intelligence is something you can build over time through iteration, study, and the willingness to treat your podcast as a serious creative and business endeavor rather than a hobby project. And when you are ready to accelerate the growth of a show that has already proven its audience fit, the PodcastCola team is ready to help you build the guest strategy, promotional infrastructure, and PR presence that compounds your existing momentum into sustainable, measurable growth.